There’s a lot of content on the Decentralized Recovery (DeRec) Alliance website that talks about why and how to protect secrets of any type with the open DeRec Protocol. But there isn’t a lot of content that describes the order of the DeRec protection and recovery workflows and how the developers of wallets and other applications should be thinking about those processes. In this two part series, you’ll get an idea of the steps involved in order to first protect a secret with the DeRec Protocol, and then how to recover that secret. Along the way, you’ll gain a better understanding of the rationale behind each step.

As a reminder, there is no official DeRec application that users can download from an app store. For example, an application from the DeRec Alliance that might be used by an end-user (known as a DeRec Owner) who wants to protect their secrets or someone else (known as a DeRec Helper) who wants to assist Owners with the protection and recovery of their secrets. DeRec is an open, royalty-free protocol that, like other open protocols (eg: “HTTP” aka “the Web”), can be freely supported by many applications and websites whose developers understand why the idea of protecting and recovering secrets through a decentralized approach can be of value to their end users. Over time, there will be many apps and websites available through app stores and the Web that support the DeRec Protocol. 

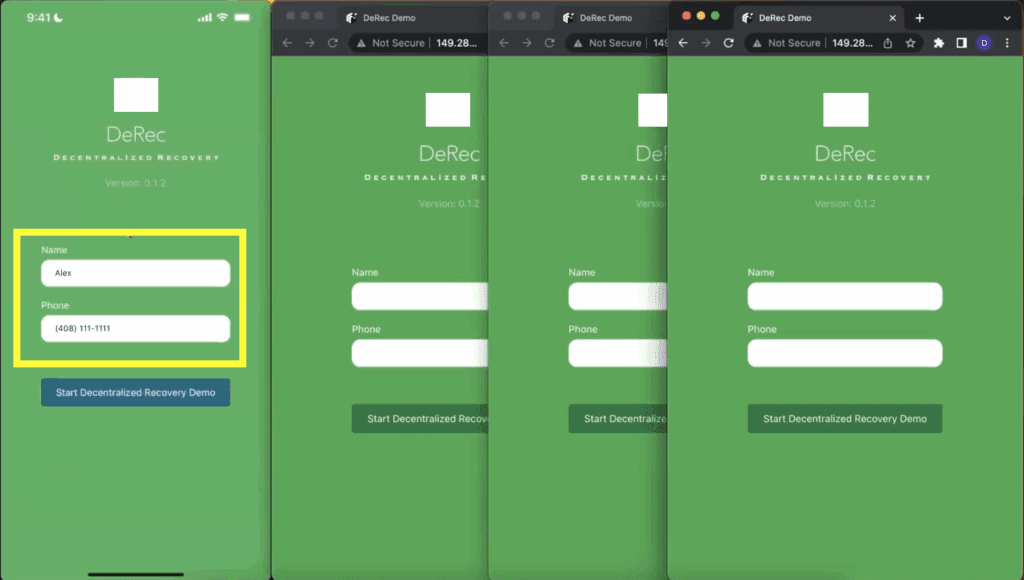
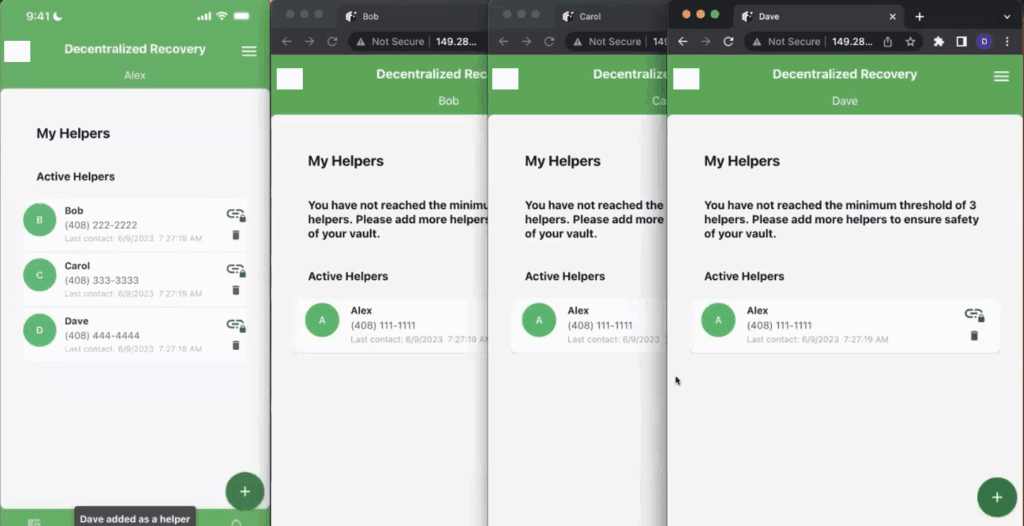
As an additional reminder, the DeRec Protocol is like other protocols in that it leaves most of the user interface (UI) design decisions to the developers of DeRec-compliant applications. Like many standard workflows, there is a sequence of events that cannot be circumvented. For example, a DeRec Owner must be connected to a minimum of three DeRec Helpers before a secret can be protected with the DeRec Protocol. It is also impossible for the DeRec Protocol to recover a secret that wasn’t protected with the DeRec Protocol in the first place.

This two-part series will broadly cover that sequence and the necessary prerequisites for a typical DeRec workflow to advance from one step to the next. But, it should be noted that the example provided also reflects certain UI choices that were made by the designer of our demo application. Designers of other DeRec-compliant applications are free to make their own UI choices when it comes to their implementations of the DeRec protection and recovery workflows. 

Cryptocurrency Wallets are Great Candidates for the DeRec Protocol

The open DeRec Protocol is a great technology to build into cryptocurrency wallets. Why? Because of the role those wallets already play when it comes to establishing, managing, and working with the secrets that make it possible for end-users to transact with their blockchain accounts. Since wallets are already used to establish the necessary secret recovery phrases (SRPs) and private keys for working with blockchain accounts, they’re also in a natural position to manage the protection of those secrets with a technology like the DeRec Protocol. Likewise, they’re in a great position to direct the recovery of those secrets as well. 

But how are the protection and recovery processes actually intended to work and what are some of the constraints on how those processes are automated? To help readers to better understand the step-by-step, we’re going to include some screenshots from a video demo that covers both the protection and recovery steps. The full version of that video appears at the end of this article. 

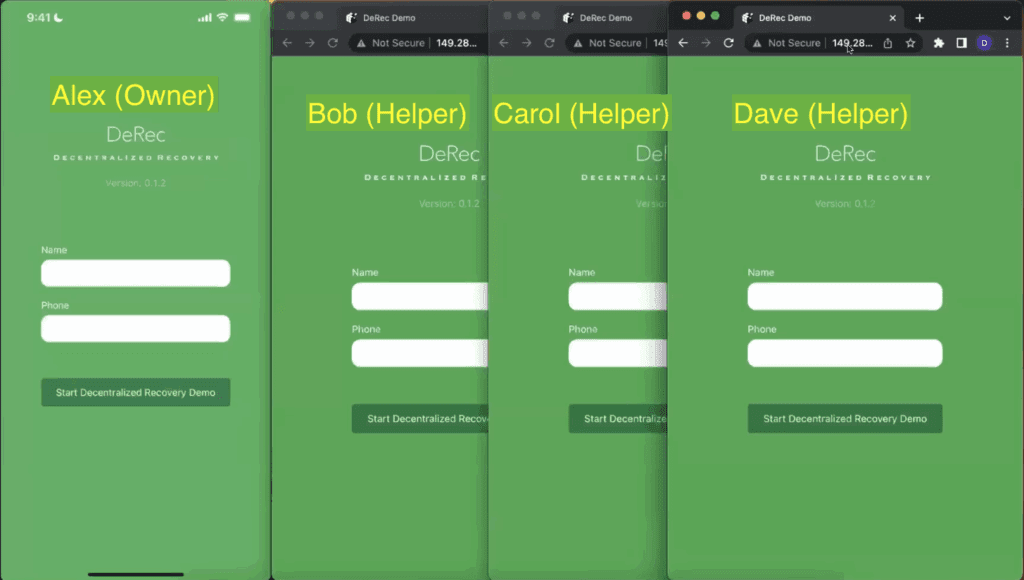
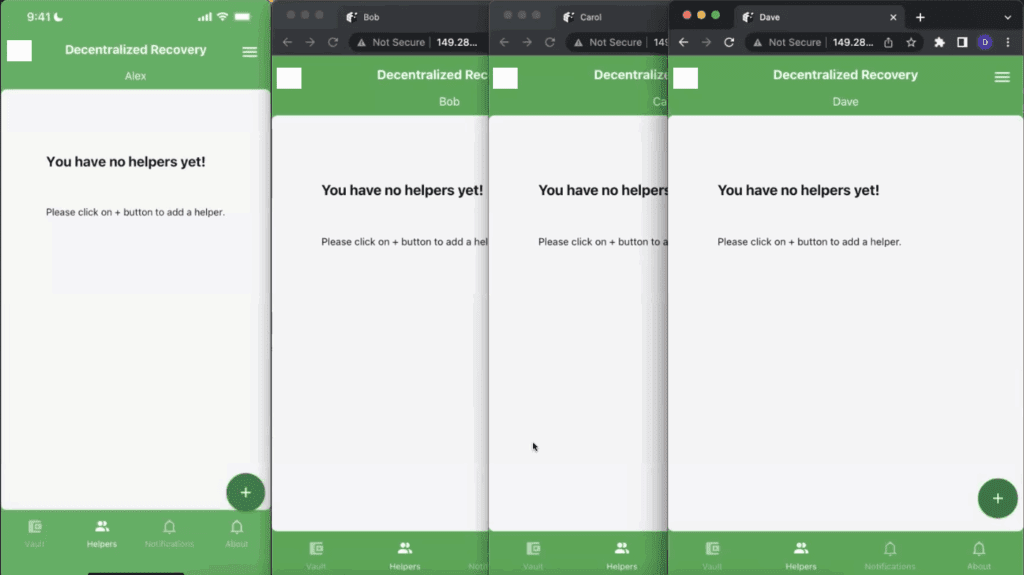
The workflow starts with four participants in the process; Alex, Bob, Carol, and Dave. Alex has a secret that he wants to protect with the DeRec Protocol. He is the “Owner” of that secret. Bob, Carol, and Dave will be his Helpers. Whereas Alex has an application that minimally supports the ability to protect a secret (any secret) and recover it with the assistance of DeRec Helpers, Bob, Carol, and Dave as Helpers should have an application that’s minimally enabled to assist Alex with the DeRec protection and recovery process. 

There’s no reason that a single application cannot include both Owner and Helper capabilities (see our FAQ: Can a DeRec Owner also be a DeRec Helper?). As you will see in one of the later steps, Alex, Bob, Carol, and Dave all have the same app; one that’s capable of being both an Owner and a Helper. But it’s also possible for an application or website developer to choose and support just one of the two capabilities instead of both. 

In Figure 1 (the screenshot below), each participant is starting with a completely clean slate and we can assume that each of them is using a cell phone with a DeRec-compliant mobile app.

Figure 1: There are four participants in our sample DeRec workflow; Alex (a DeRec Owner) and Bob, Carol, and Dave (all DeRec Helpers). A minimum of three Helpers are necessary In order for the owner of a secret to protect that secret with the DeRec Protocol.

In this next step (see Figure 2 below), Alex inputs some friendly identifiers (ie: name and phone number) that uniquely identify him to the app. This is an important step because the Helpers – Bob, Carol, and Dave – will each need a friendly way of knowing who they are paired with over the DeRec Protocol. Alex may not be the only DeRec participant that each of the Helpers are connected to. So, the Helpers need a user-friendly way of keeping track of each of the Owners they’re paired to. Similarly, an Owner like Alex must be able to uniquely keep track of each of his Helpers. 

However, it is important to note that this information is only used for the purpose of pairing Owners to Helpers and Helpers to Owners. Importantly, these unique identifiers do not necessarily have to be a name and phone number and they are not saved into a network-based directory or with a central identity provider. As will be seen in subsequent steps, Alex’s app will use the information to uniquely list each of his Helpers and each of the Helpers will use Alex’s information to uniquely identify him. But, none of the Helpers will be aware of the other Helper’s identitites. An important element of the DeRec Protocol’s security is that a Helper shouldn’t know who the other Helpers are. 

Figure 2: Alex, the DeRec Owner, must input some unique, friendly identifiers like his name and phone number. These identifiers will eventually be displayed in the apps belonging to Alex's Helpers (Bob, Carol, and Dave).

In the next step (see Figure 3 below), Alex is being presented with the option to start the demo application in the “Normal Mode” or the “Recovery Mode.” These buttons are really just for the purposes of making the demo application work. For example, if Alex was using a DeRec-compliant cryptocurrency wallet, that wallet would probably have two menu choices instead; one that maps to the “Start in Normal Mode” button for protecting the wallet’s secrets and another (that maps to the “Start in Recovery Mode” button) for recovering those secrets. As a design choice, the recovery option might be more prominently displayed immediately after a user like Alex first installs his wallet app. This is because the wallet initialization process typically checks to see if the user’s intention is to initialize a brand new wallet (with new secrets), or, if the newly installed wallet should be initialized  with the secrets (eg: a secret recovery phrase) from an existing wallet. 

Figure 3: Alex is offered one of two modes to start the app; Normal and Recovery (outlined in yellow). In this case, Alex is looking to protect a secret and so he'll start in the "Normal Mode"

Most cryptocurrency wallets actually include an import capability where users can manually enter their secret recovery phrases as well as the private keys to their blockchain accounts. For wallets, the DeRec recovery process is really just another way to source and import those same secrets. However, with the DeRec Protocol, it is unnecessary for the end-user to keep track of those secrets themselves. 

Figure 4 below shows what happens once Alex elects the option to “Start in Normal Mode” which, in the demo app, means that he wants to protect a secret. 

Figure 4: Once Alex finishes entering his friendly identifiers, the sample app shows that he has not yet paired with any helpers

Once an Owner goes down the path to protect a secret, a DeRec-compliant application must first check to see if that Owner has configured any Helpers yet. In order for the DeRec Protocol to work correctly, Owners must pick a minimum of three Helpers. As can be seen from Figure 4 above, Alex hasn’t configured any Helpers yet. In the case of the demo application, Alex only needs to tap the “+” button to start the process of adding Helpers. To be clear, this UI design choice is entirely up to the application developer. The developer could have just as easily included an option to “Add Helpers” in a menu. 

But before any Helpers can be added, some candidate Helpers — namely Bob, Carol, and Dave — must also associate themselves with their copies of the app. The screenshot in Figure 5 below reflects that they’ve all gone through the same app initialization process as Alex. As can be seen, the app has no idea that Bob, Carol, and Dave intend to start out as Helpers. For each user, the app starts under the assumption that each of the four participants wants to protect a secret and is in need of Helpers.  But in our case, as we will see in subsequent steps, Bob, Carol, and Dave are going to start out as Alex’s Helpers first.

Figure 5: Bob, Carol and Dave are running the same app as Alex and so they must go through the same process to initialize their versions. The friendly identifiers that they enter into each of their apps will eventually appear when they are listed as Helpers in Alex's app.

The next screenshot in Figure 6 below gives an example of what happens after both Alex and Bob tap the “+” buttons on their apps. In the case of the DeRec Owner Alex, two important elements are displayed on the screen. The element annotated with the red number “1” is a unique QR code that’s intended to represent Alex as a Helper to any other Owners who might want to pair with him as a Helper. Since Alex is not a Helper in this walkthrough of the protection workflow, Alex’s QR code will not be a factor in the remaining steps.

The element that is annotated with the red number “2” is showing the viewfinder for the camera on Alex’s smartphone (as if it were about to scan the QR code belonging to a candidate Helper); for example, the QR code annotated with the red #3 that is displayed on Bob’s phone. 

Figure 6: After the "+" button is tapped, the sample app goes into its pairing mode. When it pairing mode, the app is designed to show (1) a QR code and (2) the viewfinder for the smartphone's camera. If the app cannot access a camera as shown on Bob's app, it only displays (3) the QR code. The use of cameras and QR codes to facilitate the pairing process is a design choice that was made by the developer of the sample app. It is not a required part of the DeRec Protocol.

As a side note, the reason Bob’s app doesn’t show both a QR code and a camera viewfinder like Alex’s app does is that Bob’s version of the app is running on a software-based emulation of a smartphone that doesn’t have access to a camera. As can be seen under the QR code that’s displayed on Bob’s phone, it says “No access to camera.” 

The way our sample DeRec application is designed, Alex (as an Owner) pairs with Bob (as a Helper) by scanning Bob’s QR code. Once Alex scans Bob’s QR code, Alex has all of the information that’s necessary to not only pair with Bob, but to also establish direct communication with Bob over the internet. Once Alex’s copy of the app makes contact with Bob’s copy of the app, two things happen. First, Bob is listed as a Helper in Alex’s  app. But second, in the case of our demo app, a reciprocal pairing is automatically added to Bob’s app. In other words, when Alex adds Bob as a Helper, Alex is then automatically added as a Helper to Bob. After all, once Alex is paired with Bob, there’s no reason that a reciprocal Helper->Owner relationship between Alex and Bob cannot be established as well.

However, this reciprocal pairing is not a DeRec Protocol requirement. It’s up to the application developer to decide whether such a reciprocal relationship should be automatically established every time a pairing takes place. For example, if Alex and Bob were running two different DeRec-compliant apps, it’s possible that Alex’s app might only have DeRec Owner functionality while Bob’s app only has DeRec Helper capability. In that case, it would not make sense for a reciprocal relationship to automatically be established. 

Since Alex needs a minimum of three helpers in order to protect his secret (a DeRec Protocol requirement), he repeats the pairing process with Bob, Carol, and Dave. Once those pairings are complete,  the state of each participant’s app looks similar to the screenshot below.

Figure 7: Once the pairing process is complete, Alex's app shows that he has successfully paired with Bob, Carol, and Dave. However, only Alex is listed as being paired on the apps belonging to Bob, Carol, and Dave. That's because they are not paired with each other. In fact, each of them is unaware that the others are also Alex's Helpers (an important principle of DeRec's security).

As can be seen from Alex’s app on the left, he has three Helpers available to him, each of which is listed according to the unique identifiers that they entered when they first configured their apps. And then, Bob, Carol and Dave are each showing Alex as a Helper. Interestingly however, Bob, Carol, and Dave appear to be completely unaware of each other! For example, Carol and Dave are not automatically listed as Helpers to Bob (nor should they be). This is by design. An Owner like Alex should never tell a Helper who his other Helpers are. This way, if a threat actor discovers who one of Alex’s Helpers is, it cannot lead to the discovery of the other Helpers and the possibility of a compromise to Alex’s secret(s). 

Once Alex has established a minimum of three helpers to protect his secret(s), he can start adding secrets to be protected. In the screenshot below, Alex is manually entering the public and secret private keys to an Ethereum account (for protection via the DeRec Protocol). Once he clicks the “Save” button, that information is divided into encrypted fragments that are distributed to Bob, Carol and Dave in a way that the secret cannot be reassembled from any single fragment. Even if a threat actor discovers one of Alex’s Helpers and gains control of that Helper’s smartphone, it will not be enough to compromise Alex’s secret. 

Figure 8: Alex specifies which secret -- in this case the keys to an Ethereum account -- that he wants to protect with the DeRec Protocol

It’s important to note that the DeRec Protocol doesn’t require the developer to provide a manual capability for inputting secrets to protect. For example, the developer of a DeRec-compliant wallet could simply offer a “Protect” button (or equivalent menu option) that are specific to the wallet’s secrets (ie: the Secret Recovery Phrase and private keys) and nothing else.

Now that Alex has protected a secret, we will move on to Part 2 of this series to provide a detailed description of the steps Alex must take in order to recover that secret. 

For your convenience, a video of the protection workflow from which the above screenshots were derived is provided below.